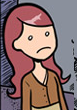
How to draw anime eyes
Here you will learn how to draw anime eyes step-by-step, different styles and options, some tips, some terms, and glasses.

If you see the “%” symbol, it means I rushed it so it might not be the best drawing ever.
Note: These “steps are very vague and general. The images are just an example, so when it says “draw the upper eye-lid,” draw it however you want, not just how it is in the picture. Drawing it like in the picture might be good practice, though.
TUTORIAL:
1. Draw the upper eye-lid. See the “options” sections for other types of eye-lids.

2. Draw the iris. It CAN touch the upper eyelid if you want, it doesn’t have to be detached as in the pic. Again, “options”

3. Draw the reflections in the eye and the shape of the pupil. The reflections should cover the pupil.

4. Color in the pupil. You are technically done! Color the iris the color you want. Continue reading if you want to know how to do one like the one at the start.

5. Make a line around halfway down the pupil, and color it.

6. Shade the iris. Alright, this part is difficult. if you are using a pencil, start by coloring as darkly as you did for the pupil, then slowly press the pencil less hard. If you are using a pen, like me, do a series of lines from the pupil to the edge of the iris. space them very closely together at the beginning, and gradually less so. Edit the eye. I made the lighting smaller.


7. OPTIONAL: Color the eye. Shading doesn’t matter now, just color the iris. Color a bit of skin around the eye, too.
OPTIONS:

This is where we get creative. I’ll run them from A-G and show you what I changed and how that makes the eye different.
A: Mostly the same, only the eyelid is droopier and doesn’t cover the iris. Also, the eye is a bit more detached. You can barely notice it, though. This style of eyes are called “Tareme” by professional mangaka. (Yes, I am an otaku) They are used for moe-moe characters, vulnerable, weak-willed, and cutesy.
B: This is the opposite. The eyelid points upwards, and the iris is close to the eye-lid. Also, I skipped steps 5-7. They are called “Tsurime” and signal tsundere (look it up), easily angered, evil, strong-willed, sociopathic, and anti-social characters. Also used for rivals. Tsurima in 3-4 are hard, more on them below.
C: These eyes have the iris connected to the eye-lid, a big reflection, unusual eye-lid shape, and eye-lashes. We are going to have to dismantle this one. An iris connected to the iris has a double purpose: a, make the character look mysterious, or b, as a specific style. The reflection makes the character look cuter. (Although, most of the time the more black there is the cuter the character is.) The eye-lid makes her a preppy girl. So, this eye is used for the yandere (if the iris is detached and tiny) or for the cheerleader girlfriend.
D: Ouch. What the heck is that? That is why you should only use eyelids like that for monsters. The iris helps support this.
E: %. Another tsurime, but this time there is no iris and the upper eyelid doesn’t have the spiky thing. These can be used for child versions of tsunderes, but the most used use is for shounen action heroes. (Note: In shounen, the eyelid can change shape. I just made it a tsurime because I wanted to.)
F: This can be used as an eye style, only it’s shoujo instead of shounen. It has an unusual eyelid shape and a bottom eyelid, and the iris is bigger. It looks cuter than most eye-styles, so use it for cuter characters.
G: This eye is lacking an eye-lid. This means it is used mostly in animals. Notice how the iris is tear-shaped instead of circular. Skip steps 5-7 to make it more animal-like.


These two eyes are mostly the same, but there are subtle differences. Which character should wear these eyes?
ON TSURIME
Note, these eyes aren’t very important, so most of these drawings are %, especially the mouths and head-shapes, since those aren’t important to the subject matter.

What’s the difference between A) and B)? They are both looking to their sides, but one of them looks awkward. Drawing tsurime in 3-4 is hard, because since the eyelid goes upward, the farthest eye is difficult to draw.
The solution is to put the farthest eye near the middle of the eyelid, so they look less awkward. Of course, they sort of look cross-eyed, but it’s okay.
GLASSESGlasses are pretty simple; draw the eye, then draw two circles/rectangles over them. Ta-da! I tend to leave a little white space near the top, or the eyes look crowded, but for the most part every glass is the same.


(NOTE: The effects are exaggerated due to the purpose of this drawing.)
%. In the first picture the glasses are highly unrealistic, but who says anime is realistic? The second glasses are more approximate to real-life glasses, but they look clunky and, again, awkward. Use a less exaggerated version of the first while a person is looking at you from the front. The second ones should be reserved for goggles.


(NOTE: The face is much too narrow, but it was the only way to capture glasses in profile)
As my mom says, anything that is easy in the front is more difficult in profile. Yes. For example, take our eyes:


The iris is now a flat disk, and it is now a tareme, Only the eyelid just reaches halfway.
To make glasses in profile, draw the eyes in profile, then, you should put a narrow rectangle over the eye. Continue by making the arms of the glasses. They are thicker near the front.


 Let's go from left to right. The first tool is the free formed shape selector. I would recomend using the second one, the square selector. The next row shows the eraser and bucket. Of course the eraser erases things! It's a VERY handy tool! The bucket fill in an area. If there isnt a close area, it will fill EVERYTHING! Next is the eye dropper tool. It works well. Use it to select your first color by right clicking it, and chose your secondary color if wanted by left clicking. The Magnifier. The magnifier is an important tool to recoloring. Use it to of course, zoom in or out. The PENCIL tool. Use it to just like write. Although it will most likely turn scribbly. The paint brush. Of course, use it to paint if not wanting to use the bucket. The spray paint. Use it to spray paint on the pallette. Depending on the size you want, mulitple small paint dots with be sprayed. The text tool. Whether you want to write Opaque (Remove the backround and extange it with a blank section for you to write) or Transparent (write with the backround there) And then there is the line and the curve. The line just makes a straight line and the curve first makes a straight line and then you change it's curve. Then the shapes! You must know what it does. Just choose a shape and draw on your pallette. Ok! So those were the tools! Let's start with lesson two!
